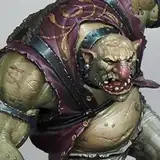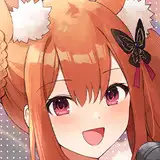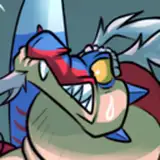
process shots of my process while working on the next RORY update!
I took some process shots while working on the next RORY update and figured I would compile them as a kind of mini step-by-step tutorial!
from the left:
1. Sketch! Sometimes I use perspective rulers to make sure everything is correctly placed, but more often than not I just kinda wing it and double check everything before I start inking.
2. Inks! For these I use Clip Studio Paint's ruler guides to make sure all the lines are even and straight. I use a brush with randomized pressure to give a more traditional looking line, which keeps everything from looking too stiff. I also fill in all the spot blacks at this stage.
3. Flats! I lay down all the colors and spend a million years adjusting them until they look exactly how I want.
4. Colored inks! After preserving the opacity of my lineart, I go over all of the non-bordering lines on a shape (aka, not including the lines that separate one object from the next) with color to give everything more three-dimensionality.
5. Final touches! In this case I added some extra shadows and put the text bubble over the corner.
A hi-res version is attached below!