If you've ever read or worked on a comic before, you know that they involve a lot of "inconvenient" drawing - lots of backgrounds, crowd shots, detailed objects, and other complex things that probably made the artist groan at the thought of them. And if they had to draw that same thing 10 times from different angles? That's the worst! Thankfully, there are lots of tools at an artist's disposal to speed up and ease the comic-making process. If used correctly, they can be seamlessly added to a comic without disrupting your style.
Note that all of the resources I'm sharing in this guide are either free to use by default or come with a license for commercial use. If you plan to use any of the tips provided here, make sure you're diligent about checking the usage rights of your materials!
For this guide I'm going to be referencing features of Clip Studio Paint, but most of this info can be applied to other programs as well.
If there's something tedious to draw, there's probably an artist out there who made a brush for it. The Clip Studio Assets store is a good example of that - there are thousands of brushes for drawing crowds, wallpaper, FX, etc.

I'd recommend going through the site and checking out what timesaver brushes are available that might help with your comic.
You may notice when using assets like these that they don't fit in with the style or aesthetic of your comic. If it's drawn with a textured brush, for example, having a really crisp and untextured asset thrown into the mix may look really out of place.
I recommend using assets like these as a base and then building off of them; for individual objects, I tend to draw my own lineart overtop the asset layer (using it like a sketch). For clusters of objects like crowds, you can use the Vector Layer feature of Clip Studio Paint to quickly switch the lineart style of whatever asset you've placed in.
After placing your asset on a raster layer and turning it grayscale or monochrome, right click the layer and click Convert Layer. Convert it to a Vector Layer (you can click the bottom button to customize the settings to your liking) and then head to the Object tool. Here, you can change the Brush Shape to any brush you've registered (which can be done under the Sub Tool Detail window).

This will also change the opacity and texture to match your brush, so it's ideal for making things as close as possible to your current lineart style.
Here's a list of some brush assets that I find useful:
Fingers (this one is weird but very cool to play with)
Similar to the brush assets, you can use 3D models to help with your comic.
In Clip Studio Paint, there are 3D models available to be dragged and dropped onto your canvas of people, objects, and even scenery (under Materials > 3D). I have a full guide available on how to use CSP's models and how to import your own into the program from other sources here.
I recommend manipulating one of the CSP character models to match the proportions of your comic characters for easy reference posing. Or, if you struggle to find one the right size, you can check the character model assets for CSP.

If you want more direct control over scenery, programs like Sketchup can be used to construct your own environments as reference. With Sketchup, you can either construct buildings from scratch or load in preexisting buildings and then use the outlines as a base for your sketch. More information about Sketchup can be found here.
When you have a 3D base made of what I want to draw, you can then rasterize and lower the opacity of the layer before drawing on top of it. Or, if you have Clip Studio Paint EX, you can utilize the Extract Line function to pull vectorized lineart directly from a 3D model. Then, following the steps from earlier, you can change the lineart brush using the Object tool to match your comic. A similar effect can be done in Clip Studio Paint PRO using this method.
Some 3D Model assets I find useful:
Blank Room (for perspective ruler)
Finding references to use can be tricky if you aren't sure where to look. It's also important to remember that, if you're relying heavily on a reference, the image should be one that is free to use commercially.
A few sites with free-to-use images:
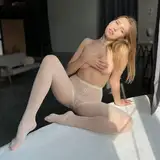
For character poses, creators like SenshiStock have a huge collection of free images to use. Just make sure you read their terms of service before referencing!
A handy tool to use when you want to reuse a backdrop is the File Objects feature of CSP (also known as Smart Objects in Photoshop).
Using File Objects, you can import an instance of a file onto your canvas, and any changes made to that file will be immediately transferred over to the one on your canvas. This is handy for making backdrops that will later get skewed into various angles. More info on File Objects can be found here.
If you have to draw the same background multiple times, then my guide on drawing a room from multiple angles is a quick and easy way to achieve that result. This method can be combined with File Objects for repeated use overtime.
Auto Actions, also just called Actions, are recordable scripts you can make that will automatically complete a task for you when played. You can record an auto action to instantly do a repetitive task you might otherwise have to do manually, like resizing a file or applying a frequently-used effect.
To record an Auto Action in CSP, click the Create New Auto Action Set button next to the action dropdown menu, then click the Start to Record Auto Action button at the bottom (red circle) to start recording. From there, everything you click on will be documented until you stop the recording. When the recording is done, clicking the action should redo all of those steps for your current layer.
While I personally recommend making your own Auto Actions to suit your specific comic needs, there are some you can download that have some useful abilities.
Some useful Auto Actions:
RGB "Glitch" Filter (Chromatic Aberration)
Separate Lineart from Sketch (if accidentally merged)
CSP's Quick Access Menu: allows you to organize tools, settings, color swatches, etc. into categorized menus for easy access. Put all of your webcomic tools and swatches into their own menu that you can quickly grab from.
Animal Photo Art References: a site that lets you find animal head references based on the angle of a 3D skull! Extremely handy for drawing animals
My CSP Guide Masterlist: has all of my guides for CSP and its many functions!
--
I hope this list was helpful! I'm always on the hunt for additional resources so if I find more I'll add them here in the future.