Part 1. Turn Design Guide,
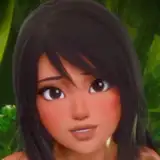
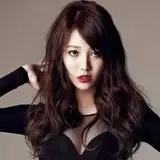
Character Design Explanation | Patreon "About the character design" part
Part 2. Model Sketch Guide,
Model Sketch Guide| Patreon
Also mentioned "Mesh alignment and texture projection":
Character design update | Patreon "Turn Design and Texture Projection" part
Part 3. Model Detail Guide I&II,
Model Detail Guide I&II | Patreon
Here is Part 3. Model Detail Guide III,
III. The third one is shaders/materials,
mostly about the camera-based projections as textures,
The basic/procedural shader nodes setting,
and GPU-driven math-operation-only NPR shaders for cross-platform projects.
Camera-Based Projections As Textures
The turn design images can be projected as the rough base color textures.

A. Copy the camera for the suit design projections,
or create a new one with the turn designs as the background images to align the base meshes.
(Press "Num0" on 3d viewport to thecamera view)
B. Select the faces in Edit Mode and Press "U" or the "UV" button,
and then select "Project from View"
(C. added and selected the suitable UV Slots.)
We may need to tweak the UV slightly by hand to fit the images correctly.
(Pressing "O" to enable "Proportional Editing" will help a lot when aligning UVs)
D. I used a procedural node tree(to mix color by face normal. Append it and connect the inputs) to merge different aligned views, including front, side, and back views, mostly.
After we get the rough base color from the turn designs, we can use the Image2Image results from the render images to detail the base color.

If we want better quality/results that I2I can't make things good enough, we still can paint or tweak further by hand,
like merging the better parts from several images, or repainting some important details on Blender or Photoshop when AI can't output reasonable, ideal results.
The Basic/Procedural Shader Nodes Setting
The most basic shader is Principled BSDF (for easier getting a Physically-Based Rendering effect, aka PBR shader, mostly used for photoreal styles, and works with the PBR lighting and the PBR camera).
Here is a great material to explain how PBR works.
Adobe Learn - Learn Substance 3D Designer The PBR Guide - Part 1
Adobe Learn - Learn Substance 3D Designer The PBR Guide - Part 2
I simply conclude my best practice below,
(In practice, for the photoreal style,
We should obey the PBR rules to get relatively reasonable results,
and then we will tweak the shaders to break PBR rules if needed,
to fake better looks for what we want,
or to get the actual look beyond what the PBR shader functions can do.)

The most common inputs are:
- Base Color(also diffuse/albedo, they are slightly different in theory, which we can search and learn from CG wiki/community, but use the same input socket in most cases)
We should get the Base Color result from the projections above, and it can be baked as sRPG maps for Principled BSDF.
- Alpha maps/Mask can be appended to the base color alpha channel.
Alpha Clip to get pixel-based edges, which can be more curving than vertex-based in most cases, especially for low-poly meshes (common on game engines), which is easy to paint by hand.
Alpha Dither for things like hair or fur card mesh, I used some common hair/fur masks, mostly.
Alpha Blend for things like glass or gem, setting a suitable alpha value will be enough.
(Better-looking glass and gem need more effort than the alpha-only setting.)
- AO, we can bake AO maps from the original meshes or high-poly meshes on the Blender Cycles render engine. Turning on AO/Raytracing to preview is enough for high-poly meshes.
(Micro-occlusion and cavity map can work similarly. They are mostly AO maps with max ray distance limitation to separate different levels of detail and better control the look.)
- Roughness, the factor has the most space for shifting,
We can set it based on some material roughness reference sheets,
remap from base color/pointness (from Geometry Node)/dirt vertex colors(from Vertex Paint Mode, Paint ‣ Smooth Vertex Colors),
Geometry Node - Blender 4.4 Manual
Editing - Blender 4.4 Manual
and multiply or darken by the imperfection maps (like Dirt/Grunge, fingerprint, or waterdrop).
- Metallic, set different areas as 0 or 1, meaning they are non-metal or metal materials.
(- ORM maps (non-color and linear) combining 3 greyscale (linear/non-color) maps, including AO(ambient occlusion), Roughness (aka 1 - Smoothness), and Metallic, as the RGB channels.)
- Normal, baked from procedural/seamless details and high-poly meshes mostly.
For high-poly meshes, we will apply some normal and bump effects for tiny details mostly.
Some additional outputs are common and cross-platform, too.
We can also take a look here:
- Subsurface Scattering, I mostly use thickness as its factor/weight, which can be baked from Ambient Occlusion Node (turned on "Inside" trigger)on Blender.
Ambient Occlusion Node - Blender 4.4 Manual
But some place like fingers and toes has thin skin on bones, but not fatty or muscular tissue, should have lower weights than areas like the ear, nose, and lips.
Its color/radius and scale depend on the fresh meat type, like human or other colorful wax or monster meat.
- Specular affects the highlight strength and color. I prefer a lower value (<0.5), and then multiply the AO factor (to decrease the highlights on the concave areas).
- Emission, to brighten some areas (which works with the Bloom effect), or achieve the look between PBR(like photoreal) and NPR(like flat color), like I prefer to link "0.5 * base color" to both "base color" and "emission" sockets for weaker shadows and highlights for some cases (which works better with customised normal like NormalEdit modifier).
(- Transmission, works well on Blender but not cross-platform,
Coat for clean coat/coating metallic,
I hardly used Sheen and Thin Film. )
Making the high-poly meshes look good will be enough.
We will detail baking in the next guide to make the assets easier to edit further, cross-platform, and performance-friendly,
which is based on retopology/low-poly meshes with suitable UVs.
Some Useful Procedural Node Trees,
maybe these are better explained during shading, and collect them one by one.
If we don't care how they work inside or want to improve them for different requirements by ourselves,
we can just append and play with them to know how to use them immediately.
Seamless material presets like fabric/cloth, metal, pearl, gem(diamond/ruby..), liquit, and hair card collected from different places.
I tried a lot, but use AI generation and built-in Blender nodes most now.
You will find them in my packed Blender project files, and I will explain them during modeling and recording in the future.
Sanctus Library - Procedural Materials for Blender 3D
Materials | All | Material Library
Fluent : Materializer - Material Tool Suite - Superhive (formerly Blender Market)
Mask Tools - Superhive (formerly Blender Market)
Also, Different Masks based on noise and geometry/scene info (like normal/pointness/dirt vertex color/island/random/edge detection/noise/imperfection maps...).
Dither for UVs or other mappings, mostly, to blur textures. (To use low-resolution images better for base color and alpha in most cases)
Normal-based Turn Mix for merging the turn design as base color (similar to "Triplanar Projection" but customised for our design tools).
I mentioned it in the "Camera-Based Projections As Textures" part above.
Exposed linear color ramp, works the same as the linear color ramp node, but exposes the color input sockets to receive more types of color than pure RGB Value.
HDRI to better preview,
HDRIs • Poly Haven
NPR shaders(WIP),
GPU-driven math-operation-only NPR shaders for cross-platform projects, 


Mecha Lord Ramen Pack | Patreon
MechaLordRamen.7z
List the features and functions description first,
and will rebuild them for different engines and post the samples here later.
(Need more spare time to combine them, make the final look better, and simpler/more elegant settings.)~
- The dot product of the normal vector and the light vector (aka Lambert) is used to output the base color, shadow/Ambient color, and rim color.
- Lambert * 0.5 + 0.5 (before remapping to output several layers of colors) as half Lambert for flat color looks.
- Apply LUT(Look Up Table, procedural color ramp or baked gradient color ramp maps)/Thickness/AO to fake subsurface scattering looks or to stand out the structure.
- The dot product of the half vector(view vector add light vector) and the light vector is used to output the highlight/specular color.
- Angel Ring Effect for anime hair card highlight. (The full-feature hair shaders are vvvvvvvery complex, which is rebuilt from the addon called Hair Tool. I want to simplify, if possible.)
Char Lib & Design Tool Update & Vmod Ringo II | Patreon
RingoII_v02_t08_Packed.blend
- Use the matcap textures to fake the anime metallic(steel/iron/gold/sliver..) and transmission(gem/ruby/diamond...) looks.
Blender_studiolights
(The Blender built-in HDRI and MatCap are useful~)
- Brush/Stroke/Hatching filter based on seamless textures with suitable mapping methods.
Stylized Brush Strokes Blender Node Group | Patreon
Hatching Shader [Free / NPR / Toon / Blender / Eevee]
After the Part 3 Model Detail Guide above,
The next guide focuses primarily on cleaning up assets.
- Retopology and baking textures,
- Rigging by skinning mesh and shape keys(blendshape), which are the most common ways to deform the meshes, and can work across different platforms.
(more optional solutions for rigging and animating, like dynamic modifiers for offline rendering projects like films and videos...)
- Finish the NPR Shaders.
Also, some content I should learn and test further,
Animating by the motion data of the skeletons and the shape keys,
and animated shaders like the vertex offset, by displacement maps or expression(procedural maps or baked frames),
and Compositing/post-processing(Global, AO, Gloom, vignette, chromatic aberrations, lens distortion, sharpness, grain noise, depth of field)
I should record how to create a game character from zero after finishing the guides.
(design, modeling, baking, rigging, and animating, mostly 40 work hours for a full-feature character)
After the raw record, I should separate them into 10-minute short videos and explain the key points in the meantime,
and I will try different styles/objects to cover most assets used for game development.
If you have any questions or would like to discuss anything further, please don't hesitate to:
Leave a comment
Email me at chambersu1996@gmail.com
Join my Discord channel: https://discord.gg/XAfS57Rrj6
I'll respond as quickly as possible.
Thank you for your understanding and continued support!
If you read it from somewhere else instead of Patreon and found it helpful,
consider supporting me on Patreon if possible.~
patreon.com/chambersu